A year of sewing (and knitting!)

Well. There’s been a lot going on in life recently, not least trying to buy our first home… so blogging my makes fell somewhat by the wayside. I found posting on Instagram much easier but even that I’ve had off-periods of.

The last couple of weeks though I have been inspired by a few new-to-me blogs and vlogs (see my updated link list over in the sidebar), so I thought I’d post a round-up of what I’ve been up to, and try to get back into blogging again…

I didn’t quite realise almost a year had passed since my last post!

So here’s a quick-fire summary of what I’ve made in the last year.

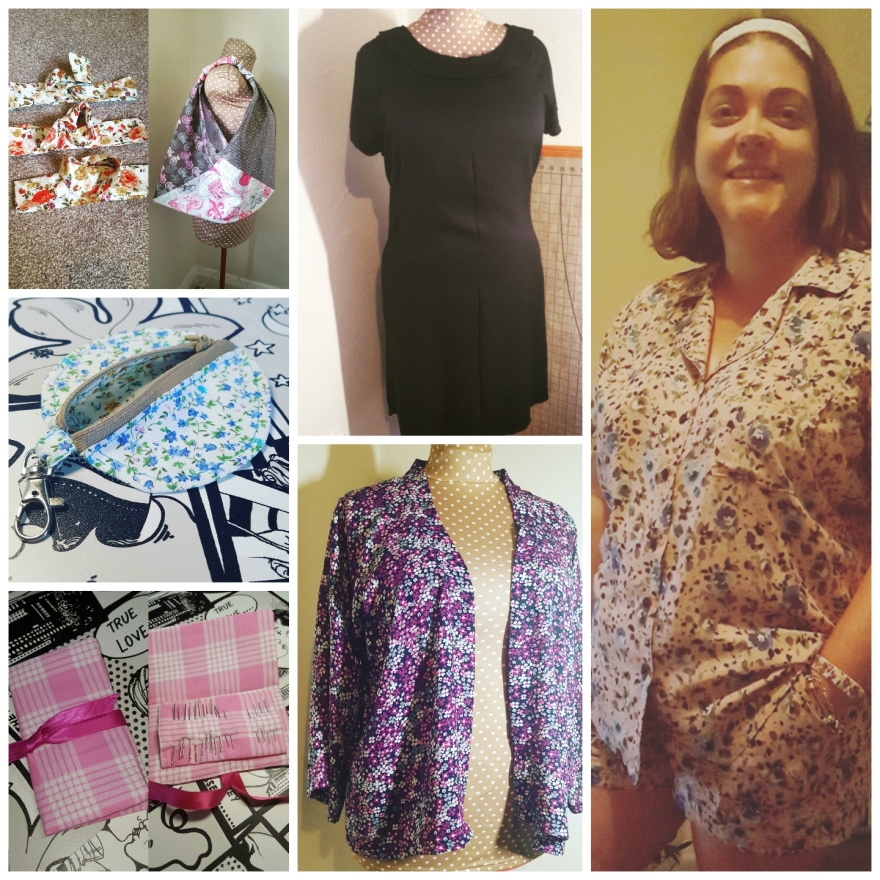
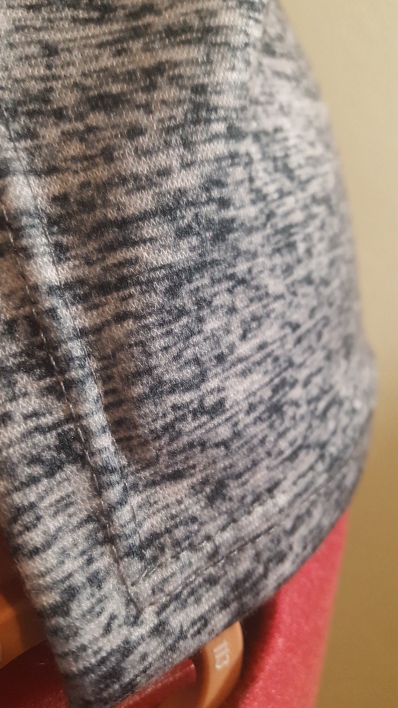
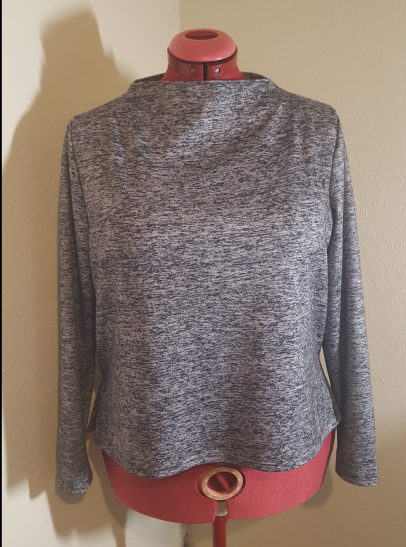
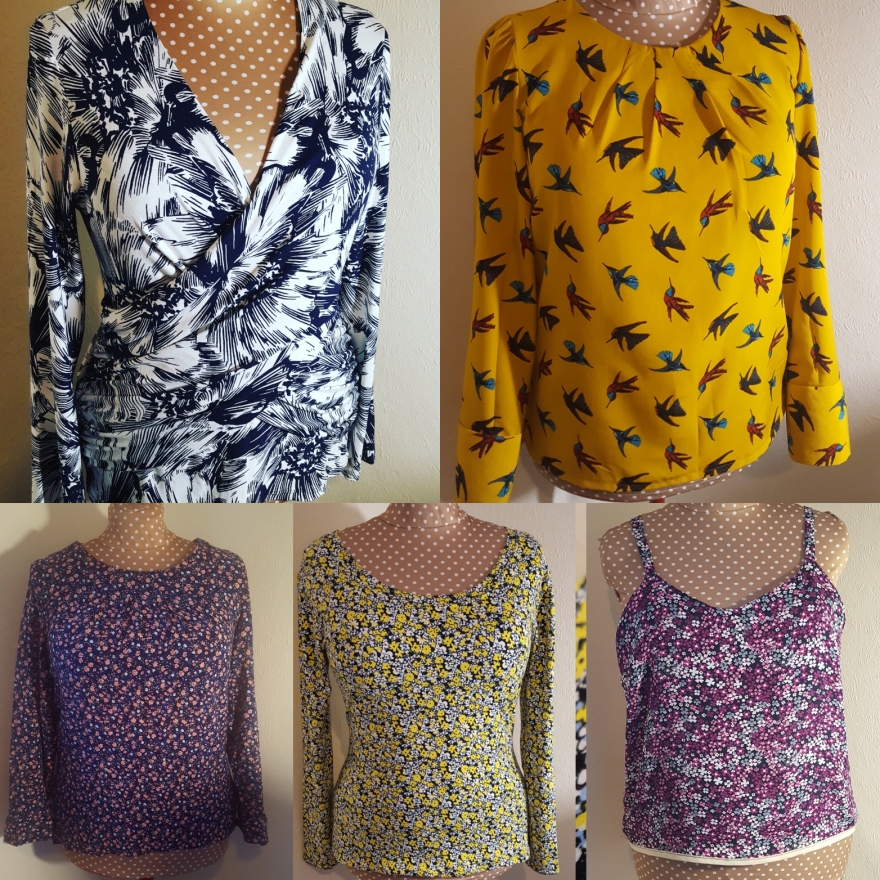
Tops – [Clockwise from TL] Threadcount 1502 wrap top, fabric from stash (Knitting & Stitching show March 2016) / Sew Over It Clara blouse, fabric from stash (KSS Oct 2017) / GBSB cami top, fabric from stash (Sew Hayley Jane April 2017) / Tilly & the Buttons Agnes, fabric from stash (KSS March 2016) / another SOI Clara, fabric from stash (KSS March 2017)

IMG_20180624_184722.jpg

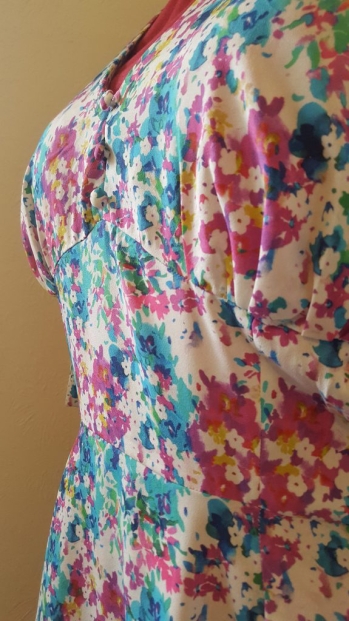
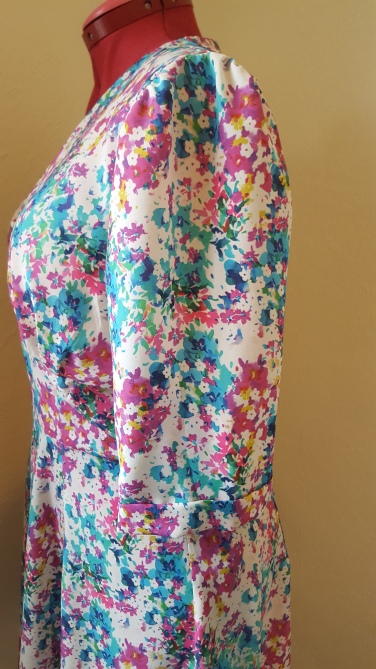
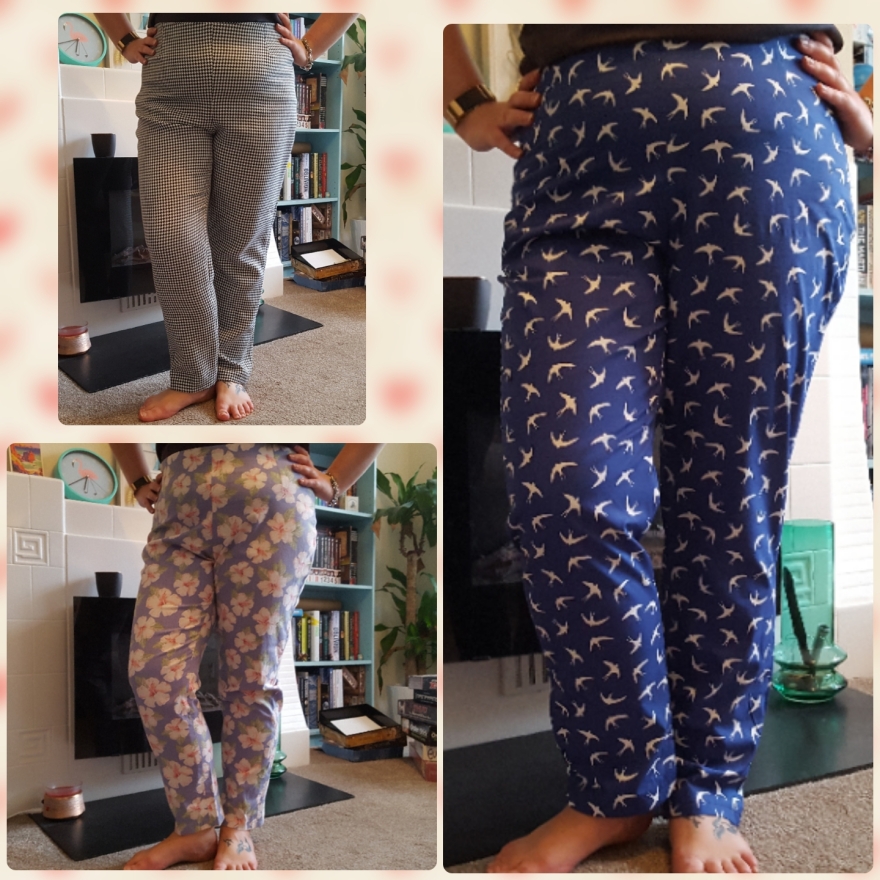
Trousers – the only pattern I’ve been brave enough to try so far (Ginger jeans TBC!!) – Sew Over It Ultimate trousers, x 3 in houndstooth from KSS March 2017, swallow print from SHJ May 2017 and floral from SHJ August 2017.

2018-06-24_18.53.30.jpg

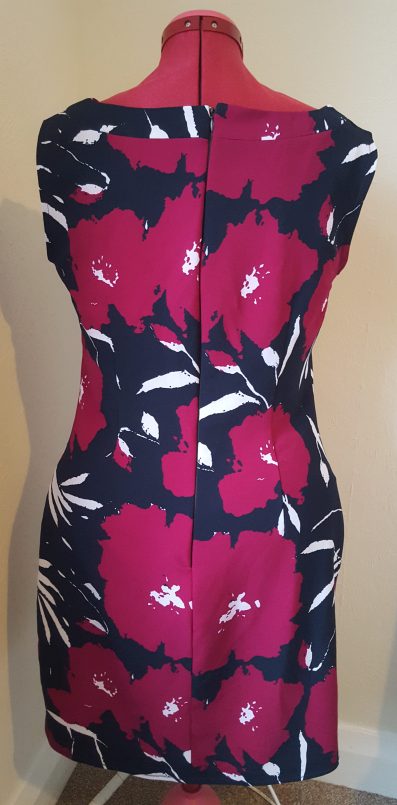
Dresses – [Clockwise from TL] SOI cowl-neck dress, fabric from stash (KSS Oct 2017) / SOI Phoebe dress, 2 fabrics from stash (bodice KSS Oct 2017 & skirt Minerva crafts, Dec 2016) / SOI Penny dress, fabric from stash (SHJ June 2017) / SOI Penny/1940s tea dress hack, fabric from stash (SHJ November 2017)

2018-06-24_18.52.33.jpg

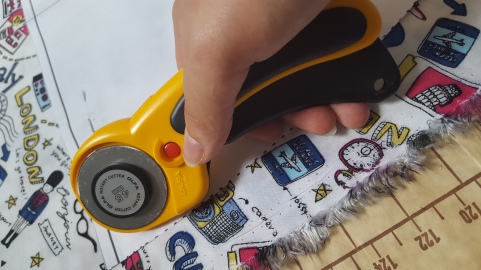
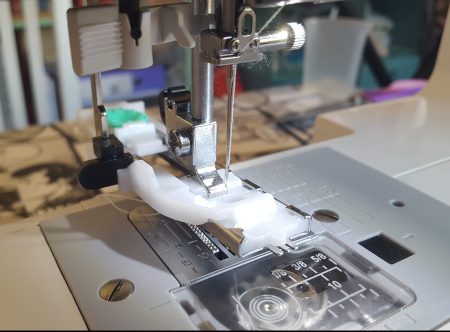
What I’ve made this month – [Clockwise from TL] Bias binding, chambray fabric from stash / Grainline Scout tees x 3, bird print KSS Oct 2017, black viscose SHJ Feb 2017 with bias trim from deep stash, anchor-print cotton SHJ June 2017 / Self-drafted music tote, fabric from stash (Birmingham rag market Aug 2016) / triangle scarf, fabric from stash (KSS March 2015) / Sew Me Something “Throw it all in” bag, fabric from stash (KSS March 2016).

IMG_20180618_224744_647.jpg

And finally…knitting! – My knitting has become way more proficient in the last year and especially since finishing my Victory sweater, I’ve had the confidence to tackle a ton more projects.

[Picture 1, Clockwise from TL] Curious Handmade Talisman Shawl, yarn TravelKnitter Tanami 4ply camel silk in Midnight Fireflies / Curious Handmade Winter Rose socks, yarn The Knitting Goddess 4ply sock in Charcoal / Self-designed ‘pixellated’ cowl, yarn Wool and the Gang Feeling Good in Rocky Grey & Forest Green / Curious Handmade Magnolia socks, yarn CoopKnits Socks Yeah! in Obsidian / Curious Handmade Fireflies Rising shawlette, yarn Manos Del Uruguay Silk Blend in Baltic & Danube

[Picture 2, Clockwise from TL] Wool and the Gang Lil’ Snood Dog cowl, yarn WATG Crazy Sexy Wool in Mustard Sally / original 1940s pattern Victory sweater, yarn Cascade 220 Fingering in Ginseng, In the Navy, Puget Sound & Azure / Graffiti on the Metro fingerless gloves, yarn Trailing Clouds Nimbus self-striping sock in Mind The Gap / WATG Get Up headband (actually made 2 of these), yarn WATG Feeling Good in Rocky Grey & Forest Green.

2018-06-24_19.00.24.jpg

IMG_20180129_233511_665.jpg

Links:

Sew Over ItSew Hayley JaneKnitting & Stitching ShowCurious HandmadeWool and the GangTravelKnitterThe Knitting GoddessCoopKnitsTrailing CloudsSew Me Something

Sew Hayley Jane boxes – 6 months of loveliness

I thought it was about time I reviewed Sew Hayley Jane‘s subscription boxes! I signed up for the Medium/Classic box back in February and just received my sixth box of loveliness.

My main reason for signing up was that I wanted to explore using different fabrics and notions. I have a decent fabric stash, but I find myself attracted to the same kinds of things when I shop. I liked the idea that I’d be presented each month with a curated box of sewing goodies and fabric and then have to think more creatively about what to make – helped of course by Hayley’s monthly blog posts with pattern ideas. Also, who doesn’t love a subscription box? It’s like a present to yourself every month.

What I didn’t count on was the wonderful community and feeling part of a club, especially over on Instagram and especially at the time when everyone’s boxes start arriving! It’s so much fun to see people posting their excitement and ideas for what they’ll make – and of course their finished garments.

I chose to subscribe to the Classic box because the length of main fabric you get – 2.5 metres – is enough for me to make most types of garment; dress, skirts, tops, trousers… At first I thought I would probably have boxes for 2 or 3 months and take a break, but they have been so lovely I haven’t wanted to stop! The £35 price point is probably at the upper limit of what I would pay for a subscription box, but that said I do think it is great value considering the fabrics, notions and other goodies have all been of really great quality and beautifully chosen. If your budget is a little tighter, the Mini box is £20 and the main difference is you get 1 metre of the same main fabric as the Classic and 3 rather than 4 fat quarters. The Luxury box would be a blowout treat for me, at £65/month, but you do get 3 metres of a different main fabric and a printed pattern from a known pattern house (Sew Over It, Closet Case and Pauline Alice have all recently featured).

The themes have all been great fun and carefully curated – you can see full contents of all past boxes here to give you a flavour of Hayley’s style. Unlike some other subscription boxes I’ve had in the past (Glossybox and My Little Box), I don’t think there has been a single thing in any of the boxes that I haven’t loved! My all time favourite box overall so far was June’s Sail Away nautical themed one, so much so that when Hayley advertised she had some extra boxes I bought a Mini one that month as well…

Below are some of the things I have made so far. I still had quite a bit of the purple floral georgette from April’s box left, so I’ve almost finished making a cami top from that as well. I think I had some of the black viscose from February left but not so much. Yet to be cut into are the royal blue swallow print cotton poplin from May (still undecided on pattern for that) and anchor-print chambray from June (definitely becoming a SOI Penny shirtdress) and various of the fat quarters (planning cushions, pattern weights, a pattern-weight storage bag and not sure what else).

Clockwise from bottom left:
Needle case (fat quarter from Feb box)
Earbud pouch (fat quarters from March box)
Wired headbands and origami bag (fat quarters from March and April boxes)
Black shift dress (main fabric from Feb box)
Carolyn pyjamas (main fabric from March box)
SOI Kimono top (main fabric from April box)

So, what was in July’s box? Time to find out…

Classic box of loveliness tied up with string…
Handwritten note…

I love that the boxes are always hand-tied with raffia (yes I keep this too!) and have a handwritten, personally addressed note introducing the box theme. Hayley’s business is getting so popular now, I can’t imagine how long it takes her to write all of these! But I just think it goes to show how much love and care goes into these boxes.

Ooh exciting…nearly revealed!
Everything neatly in its place

Everything is always packaged so neatly in the box, despite the travails of the postal service it still looks lovely when opened. Small notions are often individually wrapped in tissue paper. I admit to a slight frisson of alarm on seeing the jam and the white fabric, but happy to report no leaks! There is always a sweet treat among the sewing goodies, because who doesn’t need a bit of a sugar rush for sewing energy?

All unpacked
All unpacked

So there we have it! July’s Summer Garden Party box all unpacked. 2.5 metres of white broderie anglaise (which will definitely challenge me to think creatively to use), 4 heavier-weight fat quarters which are very Cath Kidston-esque, 2 metres of zingy purple gingham bias tape, super cute Time for Tea notebook, beeswax thread runner (lifesaver when I get back to my embroidery/cross stitch project), matching Gutermann thread as always for the main fabric, and not forgetting the jam! There is always also a little card with links to fabric care info (which I totally always pay attention to…)

I’m looking forward to Hayley’s post next week about the pattern recommendations. White broderie anglaise definitely falls into the category of a fabric I wouldn’t be likely to choose myself, so I’m looking forward to the inspiration and pushing my creative dressmaking boundaries.

TLDR: SHJ boxes are awesome, gorgeously-packaged and chock full of high quality sewing goodies. Pick based on your budget and what you want to achieve with the main fabric, and you won’t regret it!

Sew it’s summer…

Another four months have passed since I last blogged, so what have I been up to in that time?

  • I cast on a new knitting project, the Victory sweater, an actual vintage pattern from the 1940s. About to complete the front piece and then take a break for the Yarn in the City GLYC anniversary KAL (more on that later, I promise!)
  • I made another SOI 1940s tea dress, which turned out much looser fit than the first one, even though I cut the same size…mystery yet to be solved for version 3.
  • I have got a beautiful Sew Hayley Jane box every month and love being part of this club, I highly recommend them to any sewist. I’m going to try and do a review/round up post soon on that.
  • Got into fat quarter sewing, because of the SHJ boxes – I’ve made an origami bag, three headbands, an earbud pouch and have plans for some cushion covers.
  • Made a SOI kimono jacket and French seamed the whole thing.
  • Took the Closet Case Files “Sew your dream swimsuit” online course and made not one but TWO awesome swimsuits (Sophie and Bomshell) to take on holiday to Croatia next week.
  • Made a set of Carolyn Pyjamas (also CCF) in beautiful soft cottony viscose.

summer round up

And what’s next?

  • GLYC Anniversary KAL knitting project
  • SOI 1940s tea dress mark III
  • SOI Penny shirt dress
  • SOI Ultimate trousers – trying to refine fit issues with their online fitting workshop
  • Trying to use up remnants creatively with some mix-and-match projects or little cami tops
  • Finally do something with my “to refashion” pile that’s been sitting waiting for most of a year and keeps getting added to…

Quick February Roundup – Three more garments in the bag!

I may have been lacking in blogging since the first Toaster Sweater this year but the sewing has been keeping momentum.

Firstly I managed a second garment in January, a Sew Over It Betty dress in a blue floral cotton. I’d bought that fabric with a 50s style swing dress in mind, and I did have a couple of patterns in stock but they would all have required quite a bit of fitting work, and I know that Sew Over It patterns suit my sizing…so on a whim I bought the PDF Betty pattern. Mostly it went together smoothly, although I did not have enough fabric for the skirt pieces so did some re-drafting based on a GBSB circle skirt I made a while back – it worked just fine and the skirt is plenty big – I took a huge amount out of the Betty pattern pieces so goodness knows how big THAT skirt would have been! I do have some minor fit issues to fix for the next make of this pattern – the back gapes a bit on me, partly due to the straps being too loose and sit too wide on my shoulders. Given I finished this the night before the wedding I planned to wear it to, I hacked a fix by pleating the neckline and stitching a fold in the straps at the seams – I wore a cardi over it so it didn’t matter, but I’ll have to fix it better in the long run. Otherwise the fit was good (worn here with a petticoat!).

Betty dress

Secondly, I finished my Spring shrug that was my first proper knitting project and has been WIP since March last year. Currently wrapping up a few other WIPs and then will start the next knit, which will be a Victory Sweater from the V&A archives.

spring shrug

Thirdly, I knocked out another Toaster Sweater in a few hours this Sunday, from the second fabric I had bought from Minerva for the purpose. I realised this would be my first actual attempt at pattern matching, as somehow everything else I’ve made so far has been plain or in a pattern so busy or large that you don’t need to match. Mostly it’s turned out well! I tweaked the neckline for this and it sits much better than the first one – although that may be in part due to the fabric taking a press somewhat better. I also added to the length because I find the first one rides up a little.

Toaster sweater 2

Finally, in other exciting sewing news, I got my first Sew Hayley Jane box this month (medium) and loved it, so excited already for the next one. The black viscose fabric I think I have earmarked for a pair of Sew Over It Ultimate trousers, a pattern I’ve been meaning to revisit since first sewing it at the workshop. The fat quarters I think are destined for new needle case/ pincushion and maybe a headscarf too.

Aaand I’ve fired off a few entries for the Make It Today Dressmaker of the Year competition, in the vintage and ready-to-wear categories. I’m really pleased with the things I submitted so fingers crossed!

It’s also Knitting and Stitching Show time again next weekend, I’ve already got a shopping list forming so stand by for the haul post next week…


Toaster Sweater 2 – the best thing since sliced bread!

So here goes my first #projectsewmystyle make – the Sew House 7 Toaster Sweater, version 2. I got the PDF patterns for both Toaster sweaters with the #projectsewmystyle discount code, but I preferred the interesting half-high neckline of version 2 to the full on turtleneck of version 1. I got a Minerva Crafts voucher as a Christmas present, so I used that towards an order of overlocker thread and fabric. I’ve used this grey textured-look ponte roma for the first iteration, but I’m planning to make a second in this stripy black and teal ponte as well.

I really liked this pattern – the sizing and fit are pretty spot on first time (I cut a medium and shortened the sleeves by about 2″, no other alterations) and the instructions are easy and clear, whilst giving multiple options depending on your equipment. I think this may be one of the quickest makes I’ve done, although that may be in some part down to my new toy…

Shortly after my last post I found out Lidl were selling Singer overlockers for £129, and after a small amount of research online indicating this was a good deal and the machines were reliable, I went ahead and bought one. It sat in the box until this month, but I wanted to jump right in and use it for this project. I have used one once before, at a Sew Over It workshop, but that was already threaded and I really had no idea about all the different kinds of overlock stitch. I bought the Beginner Serging Craftsy class and watched most of those videos before sitting in front of the machine. That was really helpful in understanding the different stitches and the mechanics of the machine.

I really didn’t find threading my machine any trouble! I don’t know why people seem to get so worked up about it… The only issue I spent (wasted) hours on was tension – my looper threads were sometimes spot on and sometimes pulling to one side or other, and my needle threads were too loose and forming loops. No matter how I changed the tension, it was barely making a difference. I was about to post a question to the Craftsy class but looked for other questions on tension issues first – and there was an answer from Amy pointing out that Singer machines are known for very tight tension discs, and you have to really “floss” the thread down into them. Sure enough, I re-threaded and “flossed” and felt the thread pop down into the discs. I re-set the tensions to the manual recommendations, put through a scrap of my ponte fabric and it was perfect…. I’m sure you can imagine how the air was blue at the wasted sewing time!!

So I went right ahead and overlocked all my raw edges and the main sleeve/side seams on this project. I was so happy with how quickly it went from unconstructed to completely finished, well apart from hemming… and for this I decided I didn’t want to counteract my high-street like overlocking with a decidedly home-sewn zig zag stitch hem. So challenge no.2 of this project was testing whether my machine is good for twin needle stitching, and working out how on earth that actually works… turns out it’s actually pretty straightforward, as long as your machine will sew with a twin needle, and mine does. It has a second spool pin, so I just popped a bobbin of thread on that for the second needle. I ran through a test piece but didn’t have to mess about with tension too much – I suspect I got lucky with a super-forgiving fabric and tension might need a bit more work on both overlocker and twin needle for future projects.

The only niggle I have with this sweater is the neckline, the fabric doesn’t really press and the facing wouldn’t stay put, so I had to pin it along the foldline per the pattern and then run a row of tiny prick stitches, invisible on the outside, to keep the facing in place (remembering to stretch out the fabric so the stitches are loose enough to allow the neckline to stretch!) The neckline still feels pretty high at the front, so I might try and alter the pattern for the next one to give it a little more scoop.

Here’s some pictures of the finished garment:

twin needle hem.jpg

twin needle topstitching

My Sewing Roots

I like to think I have a scientific mind but I also know I believe there is a little bit of magic in the world. Likewise, I do believe that certain traits, passions or tendencies can run in families even though these have nothing to do with genetics. My nan got me into crafting from an early age; I remember having a piece of french knitting going on forever (although we called it corking), and I quickly got into counted cross stitch patterns and tapestry, not least because nan always had and still has a tapestry project on the go.

But in fact it’s my grandad’s mum; my great grandmother Florence Wilkins (née Norton) who was the great dressmaker of the family. This is her, with my great grandfather William Henry – judging from the clothes they are at a wedding, it may well have been my grandparents’. They married on leap day in February so that would fit with the fur collared coat!

great grandparents

I love this photo, for a few reasons. I like that the couple are not both looking at the camera; Florence’s attention is slightly to the right of the person taking the photo. William’s expression is fascinating, managing to look serious and yet with a quirk of a smile. But mostly I love how smartly dressed Florence is, with the perfectly fitted fur-collar coat, gloves and handbag just-so on her arm.

Sadly I never knew her, but both nan and mum have painted a picture with their anecdotes. She was a prolific seamstress, making every kind of garment for every member of the family, from pyjamas to wedding dresses. If you showed her a picture in a magazine she could make up an almost identical garment in a few days. Often she would just make things for people as well, and had a great eye for their preferred styles and what would suit them. The room she used for sewing was always draped all around the walls with fabric, work-in-progress and finished pieces. And she frequented the rag market and the other fabric institutions of Birmingham. Nan says she never said “fabric” though, she’d always say “I found a lovely bit of stuff for you today at the market” and before you knew it that had become a skirt or a blouse. Mum remembers her making a bright purple velvet party dress when she was a little girl, and knowing that no one else would be wearing a dress quite like hers!

It was also her profession, but I have no idea how she had time for paying customers amongst all the family sewing she seems to have been doing!

I think my grandparents are secretly a bit moved that I have got into dressmaking, pretty much independently of finding out all of the above. I guess a little bit of Florence lives on in me, although I am 100% sure I will never achieve the level of skill that she had. Truth be told, I am a little bit moved by it too, and I regret that I never had chance to know her and learn from her.

Olfa 45m Deluxe Rotary Cutter Review

Since I started sewing, I’ve always used a pair of fabric scissors for cutting out my fabric. I got them for Christmas a couple of years ago, and I can’t remember the brand but I know they aren’t that fancy. The grip is nice, but they are fairly chunky with a shortish blade compared to many dressmaking shears I’ve seen, and I’m not always that neat at cutting with them. Especially with finer or slippery fabrics, things can get a bit unstable.

I do have a rotary cutter, which is by Olfa, but I think it’s the smallest and cheapest model. I never had much success using it for anything significant. The blades never seemed sharp enough and I had to go over spots multiple times, chewing up the fabric and unable to get a clean line.

Nevertheless, I’ve heard so many people raving about and swearing by their rotary cutters that I thought I should give it a bit more thought. A bit of research online seemed to indicate that Olfa is popular with people cutting fabric for dressmaking and further that the 45m deluxe model came out on top.

I turned to my usual go-to online retail hub, eBay, and sure enough picked up the exact model, plus spare blade for around £20.

olfa rotary cutter

I got the chance to try it out on my latest project, the GBSB circle skirt, so cutting a medium weight soft cotton. The grip is certainly very comfortable and nicely curved into the palm, so it feels secure. The blade release is a very good feature too. There’s a button on the side which locks the blade in the retracted position, or if released the blade only comes down when you squeeze the grip. So immediately you release your grip, the blade retracts. This is primarily a safety feature but I think it’s also resulted in a better designed blade mechanism.

olfa rotary cutter
Blade is recessed, loose grip on the handle
olfa rotary cutter
Blade is cutting, handle squeezed in grip

I still didn’t quite get a clean cut first time everywhere, but I think that is probably just technique and/or my cutting surface wasn’t 100% flat (it has hinges where it folds into a concertina). Certainly cutting the long curve of the circle skirt was much easier than it would have been with scissors and it felt quicker and smoother.

I’ll certainly be testing it on more fabrics but it does seem like this was a good buying decision!

GBSB Swing / Circle Skirt

You know the advice that you should never buy fabric without a project in mind? I totally ignore that most of the time. There have been a few exceptions such as the navy twill for the jacket I had to make, but mostly I buy fabric because I like it. Sure, I consider the material type, the weight, the drape and what styles the print would suit, but I don’t always have a project in mind and sometimes end up using that fabric for something totally other than what I originally thought.

This fabric however, I have known exactly what do with since I bought it at March’s Spring Knitting & Stitching Show. The soft drape of the cotton, the brightly colored crazy travel novelty print….it screamed circle/swing skirt!

travel fabric

I used a pattern from my original Great British Sewing Bee book, which meant I had to download, print and piece together the pattern. Considering the way GBSB has inspired so many to take up or resume sewing, I find it disappointing that their books are so opaque on sizing. Each pattern is multi size, usually UK 8-16, but there are no guidelines on waist/bust/hip measurements for each as you would get on a paper pattern. Instead you get a diagram of the pattern pieces printed on one page of the book on a squared background, and the information that each square is 1cm. But again, no clear guidance on how to measure and judge sizing or adjustments from this.

GBSB circle skirt book

The pattern for this skirt is very simple (waistband and 2x skirt panels) and the only important measurement is really the waist. Based on the number of 1cm squares I judged that the largest size 16 was, including seam allowance and the buttonhole overlap feature, approximately 2.5 cm short of my waist measurement. This was easily added to the end of the waistband piece (/2 since it’s cut on the fold), and for the skirt it was added to the straight edge, /4 since there are two skirt pieces (front and back) cut on the fold.

GBSB circle skirt pattern adjustmentI actually cut the bottom of the skirt panel along the size 8 (shortest) line, even though I was also cutting along the size 16 (deepest) waistline. Given my short proportions though this put the finished skirt length just on the knee which is quite flattering.

Cutting was very quick, thanks in part to my new rotary cutter…more about that in another post! It definitely made cutting the long curve of the skirt less of a headache.

Sewing was also quick; sew the front and back skirts at the side seams, insert concealed side zip (I had one the right length and color!), sew waistband in half at the ends, turn and press, sew waistband to skirt, make buttonholes, hem and done!

Finishing the waistband seam was a pain. I think either the instructions are not clear enough or you need a bigger seam allowance. I sewed both raw edges of the waistband to the skirt, then I was trying to turn the raw edges under and top stitch – I had to do this on the inside rather than the outside so I had half a chance of keeping the raw edge under, there wasn’t enough spare.

What I think is supposed to happen is that you sew the front edge of the waistband to the skirt, then turn the back edge under and top stitch to enclose all seams. But the instructions didn’t describe this explicitly and I would have expected them to. Also because you have already stitched both waistband ends together, this makes lining up and accessing the front raw edge a bit tricky at the ends. The alternative is to do what I did but on a 2cm rather than 1.5 seam allowance, so that you have enough to turn under. This would make the waistband narrower but it’s quite generous as is.

Anyway, on to the most exciting bit of sewing this skirt – the buttonholes! The waistband design has an overlap of fabric across the top of the zip which fastens with two buttons. My sewing machine has an automatic buttonhole setting (in fact three styles) and came with the necessary foot. Essentially it works by you setting the button you will use into a gauge in the back of the foot. The needle is threaded in the front of the foot as normal, and you pull a stopper down from a fixed point on the machine to the left of the foot. Then you start the machine sewing (using the start/stop button rather than the foot pedal) and it sews a straight line until the stopper hits the stopper at the front of the button gauge. Then the machine sews a zig zag end, a quick line back to front until it hits the front stopper, then another line backwards to the gauge stopper, locking stitch and stops. Magic! You then use a seam ripper or snips to carefully open the buttonhole between the two lines of stitching.

buttonhole foot I did a lot of practice ones on some scrap fabric (probably more than I needed but it was fascinating me!) and then bit the bullet on the real thing. I think there must be a trick to lining up the holes perfectly parallel, I marked the start of mine but it was hard to see precisely past the machine foot so they are slightly off.

GBSB skirt buttons

Start to finish this is probably the quickest sew, considering I had to print and make up the pattern first too, everything done in less than a day.

GBSB skirt


Sew Over It 1940s tea dress 

I’m going to come right out and say it – this is by far and away the homesewn garment I am most pleased with so far in my sewing adventures!

I fell in love with the Sew Over It 1940s tea dress pattern well before I felt capable of making it. I bought the pattern while at the Islington store for the Ultimate Trousers workshop back in November 2015 and even though I still loved the design I was more than a little daunted by the 11 pattern pieces actually resulting in 20 elements once cut!Sew Over It 1940s tea dress

Anyway, I already had a fabric in mind that I’d got at the Knitting & Stitching Show March 2015, and a goal – Twinwood Festival, August bank holiday. In the event, I’ve used a different fabric (bought at this year’s K&S Show) and hit an event a month ahead of my deadline! What on earth is going on…?

I actually started on this pattern back in May, and got as far as pattern tracing, cutting out and marking. I cut a size 16 (again) with no adjustments (again) based on a quick toile of the bust section (again!). But then everything got packed away for moving house, then June shot past what with sorting out the new place and a holiday and various upheavals at work, before I could get the sewing stuff out again.

But finally one weekend early in July I decided to tackle it. The fabric is a lovely bright floral print, perfect for summer, in a light and floaty viscose. Lots of drape and lovely to sew! Once I’d sorted out my 20 (!!) pieces again, I got down to sewing. I really liked that the pattern puts the trickiest part first – the bust panels! This looks really complicated but actually it’s not and results in a really professional-looking design which is also very flattering provided it’s fitted correctly. The trick is really taking your time over adjusting the gathers where the bust joins the waist panel.

1940s tea dress bust

The rest of the construction is effectively joining panels; five in total for the skirt (front, side fronts, backs), side backs and backs in addition to the bust and waist panels, then join the top to the bottom. The sleeves are a nice 3/4 length and faced, with a turnup which is a nice detail.

1940s tea dress side view

I managed pretty well matching my seams. Pattern matching is fortunately not really an issue for this print, but the effect of the vertical seams running down the bodice, back and skirt panels is important. I still didn’t manage to get the waist seams to line up across the zip at the back, and I’ve no idea how because that zip was dead straight I swear!1940s tea dress back

There was a fair amount of hand-finishing on this dress too; the three decorative self-cover buttons on the bust, catch-stitching the sleeve turnups and the facing inside, the zip seam allowance at top and bottom, plus I also put in some small stitches to hold the neck facing in place at the shoulders as despite understitching, the lightness of the fabric meant it just wasn’t going to stay turned under.

1940s tea dress buttons

This dress was undoubtedly a lot of work, I estimate 8-10 hours of sewing and hand finishing, including all the pressing and seam finishing, but I think it was well worth it.modelling 1940s tea dress

I think it’s testament to how chuffed I was that I wore it to a very posh city wedding at The Honourable Society of the Inner Temple, along with a fetching hat from Bellapacella of Spitalfields Market.

I also reviewed this pattern on The Fold Line: CertainStyle reviews 1940s tea dress on the Fold Line

New Look K6176 shift dress

I think this was my quickest sew from start to finish. I headed off to Paris for a work-related conference in May and although I’d had this pattern in mind and a couple of fabrics lined up for some time, the decision to make this dress and try to finish it in time to take to the conference was pretty last minute!

I was attracted to this pattern over the other shift / pencil dress styles I have (most of my patterns are the result of my monthly Sew magazine subscription, this being no exception) because it had relatively few pieces. I’ve been amazed how complicated some designers can manage to make what is essentially a very simply-shaped garment.

New Look K6176

New Look K6176 has several variations with sleeves, banded hems and pockets, but I went for the simplest sleeveless, single fabric, no pockets design (view D). With the bare minimum of elements (front, back x 2, neck and sleeve bands) and a kind fabric it was pretty quick to cut out. My fabric was one I picked up at the Knitting & Stitching Show in March 2015 – yes, really! A polyester sort of fabric with a slight crepe/textured feel. Identifying and describing fabric is really something I need to learn more about! It’s purple and black with an all over abstract floral motif.

No lining, facing or interfacing meant I could get stuck right in to sewing. It’s basically sew front and back together, and finish the neck and arms with bands. I was glad I’d already made the Agnes top because now I knew what I was making with a neck band – the instructions in the Simplicity pattern were much more confusing so I think this would have stalled me.

K6176 neck back & armhole

The only slight hiccup was that I discovered I didn’t have a black zip. This keeps happening, I’m sure I’ve got some stock notions and then when it comes to it they are nowhere to be found. I made do with a dark brown one, and did a concealed zip rather that the normal one the pattern uses, so you can’t really tell.

K6176 back dress

Fit wise, I was pretty pleased with the length and overall fit given I didn’t do any pattern adjustments. The only niggle is the upper back / neck which is a little too big. It doesn’t quite gape but it’s not far off. I’ll have to try and adjust the pattern for the next iteration but that probably also means calculating a reduction in the length of the neck band…maths isn’t my strong suit so I’ll have to see if Simon can work out the formula!

K6176 back neck

I might have been hand finishing at gone 11pm the night before flying to Paris, but I think it shows how far I’ve come in my sewing adventure that I would a) be able to achieve that and possibly more importantly be happy to wear a me-made garment at a conference representing my company to prospective and existing clients.

K6176 front dress